These photography tips are designed to help you make your photographs looks bright, eye catching and professional and you don't need to have an expensive camera to do this!
This tutorial comes in two parts:
- How to make a Light Box
- How to edit your photos to make them pop
Part 1: How to make a Light Box
These tips are one way of taking great photos, but they are certainly not the only way. I hope that you will be able to use this tutorial as a starting point and gain the confidence to make photographs with your own style.
First select a box that is the right size for what you want to photograph. For small items like jewelery a box about 30cm wide or 1 foot is good, although if you want to photograph larger items you will need a larger box.
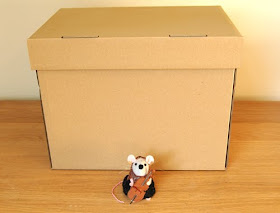
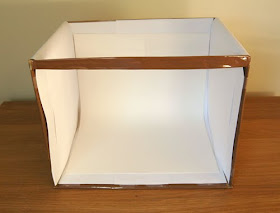
Cut out the top of the box and the front, leaving a bar across the top to help your box keep it's shape
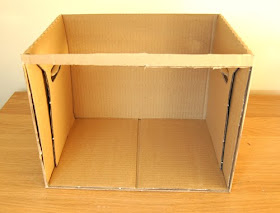
Line your box with white paper, making a curve with paper in the back horizontal corner so that it won't show up in your background.
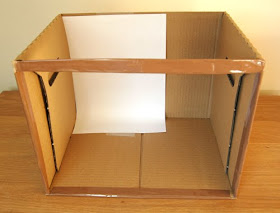
Make sure you put white paper on the sides too, this will help to bounce the light around even more and make your photographs really bright.
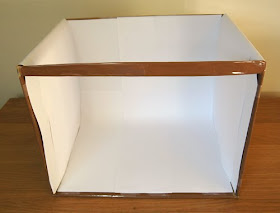
To avoid any lines in your photographs, use a large piece of paper for your backdrop, I love to have a white background so I am using a piece of A3 white card, but you can use any color you like. You can also use fabric if you prefer.
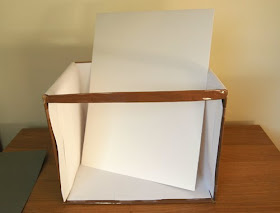
Stick or pin your background in place,
again making a curve in the horizontal corner.
again making a curve in the horizontal corner.
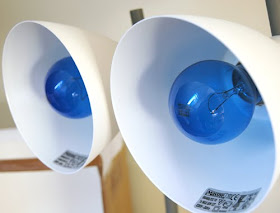
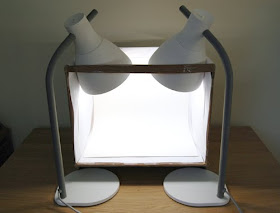
Your light source should be 2 adjustable lamps with daylight light bulbs, 100watts will get a great result. Daylight light bulbs are best because the colors in your photographs will be more accurate than if you use a regular yellowish bulb. Daylight light bulbs look bluish when they are not on. You can get daylight light bulbs from any good electrical store, some art supply stores also stock them as painters prefer to use them too.
Arrange your lamps on either side of your light box, if the stands poke under your box -as they do in mine - then stand your box on some books to make it flat. Some people prefer to just use one lamp, but I find using 2 will eliminate all shadows and shows up the details on your work much better.
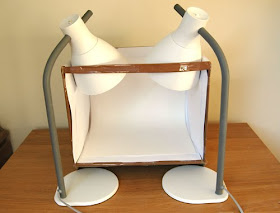
As you can see, when the bulbs are on the light bounces around in the box in all directions! Perfect for taking bright photographs
If you have a tripod for your camera then set it up in front of your light box, if you don't have a tripod then add one to your christmas list! For now you can stand your camera on something to balance it.
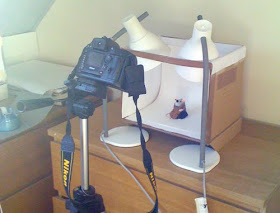 The reason for the tripod is that you don't want to be using the flash on your camera. If you turn off the flash on some cameras then any photographs taken with the camera in your hands will look shaky, the tripod will keep it stable and make your photos nice and clear.
Finally your light box is ready! Place your items in your light box, switch on your lamps, arrange your camera (remember to switch off your flash) and take some photographs!
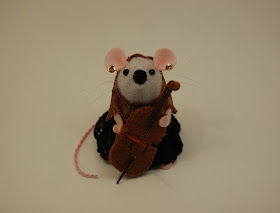 Every camera is different, some of you may find that you are happy with the photos you get just from the light box. But if you are like me you will still want to make them brighter. Part 2 explains how to do this...
Part 2: How to edit your photos to make them pop
So you have your photos from your light box, but they are still a little dark and dreary. This tutorial will show you how to edit your photos to brighten them up and make them really pop!
To do this you will be using the "levels" tool that is found in almost every photo editing software. I will be using Photoshop for this tutorial. If you don't have any photo editing software then I recommend you try picnic which is a free and simple photo editing site (to get to the levels tool on picnic: upload a photo, then click "exposure" and then "advanced").
To open the levels tool in Photoshop, click the "layer" menu then "new adjustment layer" and select "levels", then click "ok" to open the tool.
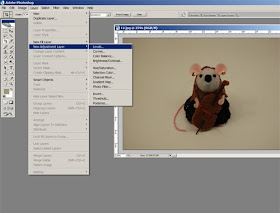
The levels tool looks like a graph or histogram. By using the dropper feature and sliding the arrows around you can create different effects, including lightening up your photographs.
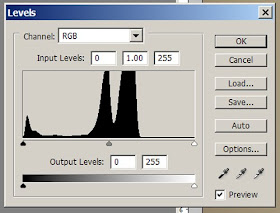 Use the dropper feature to select the lightest color in your photograph. (The dropper does not appear on the picnic website, but it will appear in Photoshop and a few other photo editing programs.)
The dropper is the 3 little icons in the bottom right corner of the levels too. You can use these to select the darkest, lightest and medium tones from your photograph. For my purposes I only want to use the lightest one (on the far right) but feel free to play around with them to see the affects you can get.
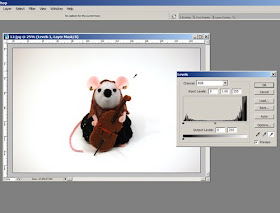
Select the white dropper and then click it on the lightest part of your photograph. You can keep choosing a new part until you are happy with the result. As you can see, I have selected the brightest area of my background. This will automatically readjust the photograph.
Next you can also use the arrows on the slider under your histogram to lighten or darken your photograph further. If you are using picnic then this will be your main way to lighten your photographs. Click the arrow in the middle of your histogram and slide it to the left and right to see the results
Slide it to the left to lighten your photograph
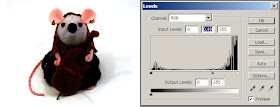
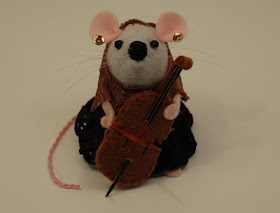
I just want to lighten my photograph slightly so that you can pick out the details in the Cellist Mouse's skirt. When you are happy with your adjustments click "ok"
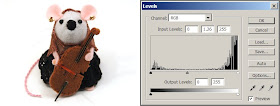
If you are using Photoshop, you will need to "flatten" your image before you can save your document as a .jpg . To do this select the "layer" menu and click "flatten image" you are now free to save your file. Feel free to crop your image if you want to before you save.
Here is what my photograph looks like before and after using Photoshop to brighten it up...



wow! fantastic post - well done - and thank you. xx
ReplyDeleteI have been wanting to set up a light box but the other directions I have are way too complicated. Thank you so much for this easy tutorial!
ReplyDeleteThanks for sharing. This tutorial is absolutely great! I want to build a light box too.
ReplyDeleteVery cool!!! Me want too!
ReplyDeleteyou are a starrr..thank you soo much for your great effort...
ReplyDelete... what a great post, thank you so much for taking the time to create it to share with us :)
ReplyDeleteThanks for this! I have really been struggling for the right spot and lighting for taking photo's of my jewellery! I will be looking for the right box to have a go with this and looking forward to the results!!
ReplyDeleteVery informative.
ReplyDeleteIsn't that amazing!
ReplyDeleteThanks for giving us this demonstration. A lot of work goes into your pictures!
LOL
Thank you!!!
ReplyDeleteYou are the best!
ReplyDeletethis Tuturial is really easy to anderstand and
so helpful,
thank you very much!!!
This comment has been removed by the author.
ReplyDeleteI can't wait to have a working camera again...& I don't have an online shop. But this is so very generous & lovely of you that I wanted to say so.
ReplyDeletexoxo
ciao-meow
very very helpful!
ReplyDeleteWow! Very interesting! thanks for sharing!
ReplyDeleteExcellent tutorial! Thank you :)
ReplyDeleteGreat post! Bravo and thank you!!! :)
ReplyDeleteWhat a cool mouse studio! really enjoyed this blog, what fun! • x •
ReplyDeleteThank you for the quick review! Its been forever since I've touched photoshop cause I'd forgotten what I'd learned, and I'm very happy to be using it again so readily!
ReplyDeleteFor those without Photoshop, Microsoft Office Picture Manager has a similar tool to using the dropper tool to automatically tell the program what part of your photo should be white. Very helpful tool regardless of which program you use!
Excellent.. Really awesome..
ReplyDeleteThank you! I have been struggling with this as I havent got photoshop, but I will definitely try picnic and follow your suggestions. Off to become a follower of your blog now too! woo!
ReplyDeleteThanks! I really like when people help others! We should all have beautiful photos and a chance to make the front page!
ReplyDeleteBravo...going to build my lightbox...
Good and informative tutorial. Well explained and its very easly understandable tutorial. Keep blogging and thanks for sharing such an informative tutorial.
ReplyDeleteThank you so much. I've finally found someone to follow. You are my first!
ReplyDeleteI've always thought your pictures are the clearest and brightest on Etsy, so to find this tutorial was brilliant! Thank you so much - I can't wait to make my own lightbox.
ReplyDeleteExcellent tutorial! Thanks.
ReplyDeletevery cool tutorial... I am not nearly as sophisticated and use a white wall and the top of my fridge!
ReplyDeleteFabulous! Thank you for taking the time to share this with us. :)
ReplyDeleteGreat post! Thank you!!!!
ReplyDeleteThank you thank you! I have Photoshop and always avoided the levels tool because I couldn't find an easy-to-follow tutorial. You're the best!
ReplyDeleteLove this! I've just set up my etsy shop and am having a terrible time with photos...
ReplyDeleteWill give these tips a go!
Wendy
http://www.etsy.com/shop/alwaysgreener
Great post!
ReplyDeleteThanks for sharing :)
EXCELLENT instructions...I can actually DO this. Just wondering...is there a website that you can recommend which sells these lamps?? I don't own anything like the ones pictured. Thanks a bunch! XO, J.
ReplyDeleteHi Juju,
ReplyDeleteI'm sorry I don't know any websites that sell daylight light bulbs. But you should be able to get them from a good electrical store or art supplies shop.
Otherwise google "daylight light bulb" and see what you can find online.
Good luck,
Anna
I have to comment to thank you for a super useful tutorial. I started a food blog recently and spend an inordinate amount of time fixing the light and getting rid of shadows for the images and can't wait to try the light box method. Thank you!!!
ReplyDeleteThe best lightbox tutorial ever!
ReplyDeleteI am so going to put it into practice!
4 Years have past and people are still referring to your post - amazing, isn`t it?
ReplyDeleteAnyways, thanks a lot for writing this! I made a lightbox today but my photos were so-so, the background wasn't white as I hoped it would be, thanks to your tutorial it's all fixed!
Did you use a macro lense to take the pictures?
ReplyDeleteHi there. No this was taken with a standard lens with 5.8 aperture. No need for a macro lens to get these results.
Delete