So you have taken your photos with a lightbox or in daylight, but they are still a little dark and dreary. This tutorial will show you how to edit your photos to brighten them up and make them really pop!
To do this you will be using the "levels" tool that is found in almost every photo editing software. I will be using Photoshop for this tutorial. If you don't have any photo editing software then I recommend you try picnic which is a free and simple photo editing site (to get to the levels tool on picnic: upload a photo, then click "exposure" and then "advanced").
To open the levels tool in Photoshop, click the "layer" menu then "new adjustment layer" and select "levels", then click "ok" to open the tool.
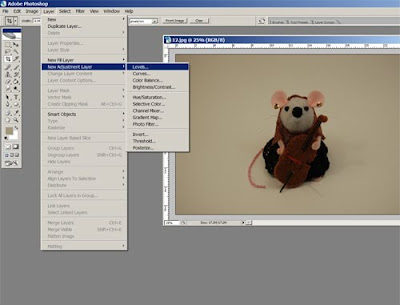
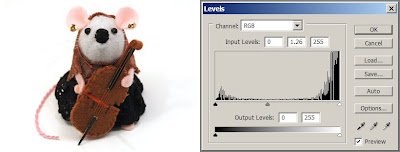
The levels tool looks like a graph or histogram. By using the dropper feature and sliding the arrows around you can create different effects, including lightening up your photographs.
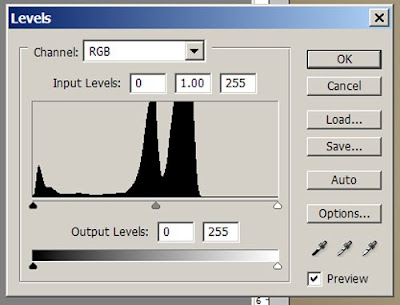 Use the dropper feature to select the lightest color in your photograph. (The dropper does not appear on the picnic website, but it will appear in Photoshop and a few other photo editing programs.)
The dropper is the 3 little icons in the bottom right corner of the levels tool. (in later editions of photoshop it is on the left side of the box) You can use these to select the darkest, lightest and medium tones from your photograph. For my purposes I only want to use the lightest one (on the far right in this example) but feel free to play around with them to see the affects you can get.
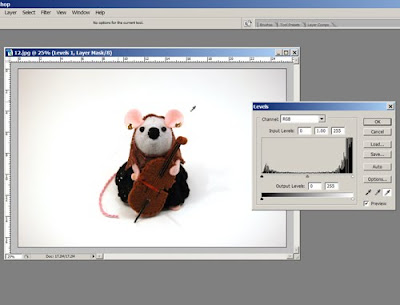
Select the white dropper and then click it on the lightest part of your photograph. You can keep choosing a new part until you are happy with the result. As you can see, I have selected the brightest area of my background. This will automatically readjust the photograph.
Next you can also use the arrows on the slider under your histogram to lighten or darken your photograph further. If you are using picnic then this will be your main way to lighten your photographs. Click the arrow in the middle of your histogram and slide it to the left and right to see the results
Slide it to the left to lighten your photograph
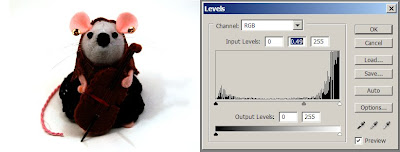
I just want to lighten my photograph slightly so that you can pick out the details in the Cellist Mouse's skirt. When you are happy with your adjustments click "ok"
If you are using Photoshop, you will need to "flatten" your image before you can save your document as a .jpg . To do this select the "layer" menu and click "flatten image" you are now free to save your file. Feel free to crop your image if you want to before you save.
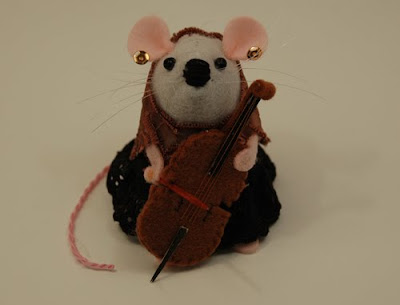
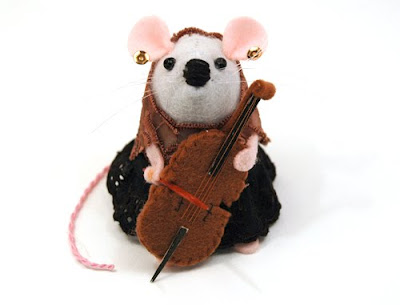
Here is what my photograph looks like before and after using Photoshop to brighten it up...


No comments:
Post a Comment